Making the main dress hadn't been too bad (even though I did have to do it twice!) - all the seams were pressed flat and finished with a simple turn-and-stitch treatment from the waist down. I chose this because the over skirt was open to reveal the ruffled under-layer and I wanted to avoid the chance of any unfinished seams being visible.
 |
Turned-and-stitched skirt seam
|
 |
The underskirt, folded in half, marked
and ready for ruffles
|
 |
Ruffles of doom - the first batch
|
The ruched strip, which would be sewn
down the centre of the seam between the over skirt hem and the
ruffle, was made by cutting out several 2.5" wide strips (to get
a finished width of 1", I doubled that and added 1/2" for
1/4" seam allowances). I seamed them together and folded the
resulting uber-strip in half lengthwise, right sides together, to get
one extremely long tube. I completed it by sewing the tube along the
lengthwise seam, turning it right side out and pressing it flat.
To attach the ruffle, I started off by
dividing both the skirt hem and the ruffle into eight parts and
marking each division with a large safety pin. I then matched up
each division in both parts, pinned them together and pulled the
gathering threads on the ruffle until it was the same length as the
skirt. I was aware of this 'divide and conquer' method of gathering,
but I usually took a more trial and error approach. After finally
trying this method, I'm definitely sold on it - though it initially
felt like it would take a while to mark the divisions of each piece,
it saved tons of time in the end.
After that it was just a matter of
attaching the ruffle to the skirt. I did the same 'divide and
conquer' method for the ruched strip and attached it over the hem.
At this point I had to go VERY slowly since I was sewing through so
many layers!
 |
Sewing on the ruched strip. Pictured
is one of the three
needles that gave their lives to complete this
thing
|
After that I gathered and sewed each
ruffle to the underskirt base (which went much faster, thank
goodness!), then it was just a matter of seaming the bodice and doing
some final finishing. There was a bit of last minute sewing of the
sleeve elastic (of all times to misplace every bodkin I own!), but in
the end I'm happy to say that it all came together and my friend
loved the end result!
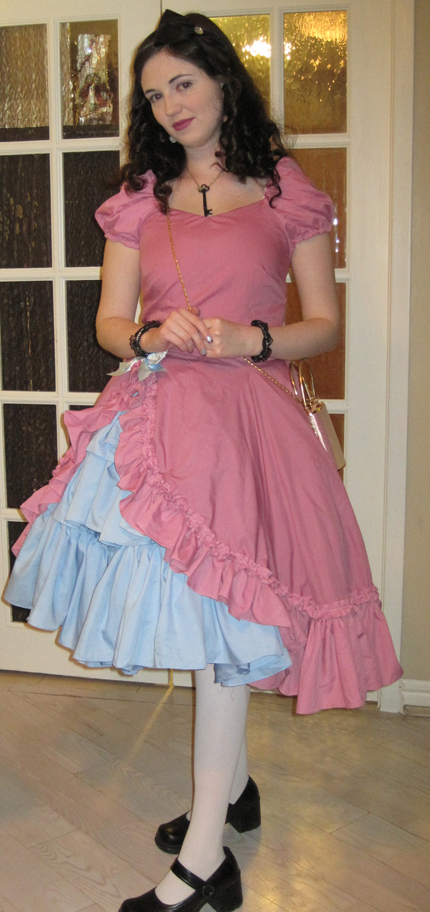

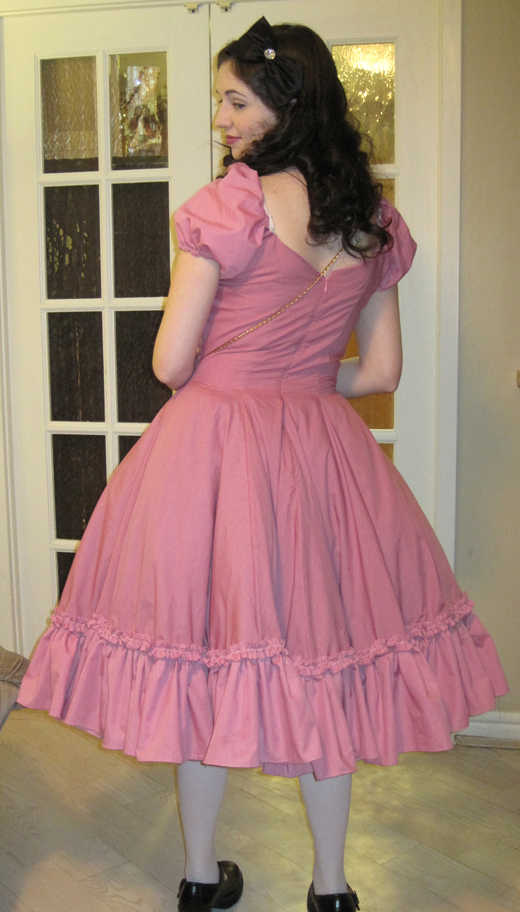
Overall, it was definitely a
challenging project that taught me a lot (including how to bounce
back from a serious screw-up). It was really rewarding and I
couldn't be happier with the end result.
No comments:
Post a Comment